Showing posts with label Halloween. Show all posts

Wednesday, October 31, 2012

Happy Halloween! Salty, Spicy Pumpkin Seeds

It’s here! Happy Halloween everyone! The weather here isn’t exactly ideal but we’re still hoping for a good turn out of trick or treaters this evening. Otherwise we’re going to have an awful lot of candy to eat! Here’s a peek at my little trick or treater – his no sew costume was inspired by the unicorn costume here.

No Sew Horse Costume

If you’re leaving your pumpkin carving for today then you’re going to love this recipe from One Hungry Dude for awesome pumpkin seeds. Have fun tonight, everyone!

Pumpkin seeds are a favourite treat for me, around this time of the year. Since Sarah enjoys carving at least one pumpkin for Halloween, there's always a big batch of leftover seeds to work with. Try this simple recipe, and you'll be rewarded with a tasty and healthy snacking option, while your kids are taking advantage of their Halloween spoils.

Salt Spicy Pumpkin Seeds
Ingredients
• Seeds from one Pumpkin
• Olive Oil
• Salt and Pepper, to taste
• Juice from about 1/4 of a Lemon


Place a cookie sheet in the oven, and preheat to 375 F. Once the oven is hot, take the sheet out. Spread the seeds on the sheet in a single layer. Lightly drizzle the olive oil over the seeds, then sprinkle with salt and pepper. Squeeze or drizzle the lemon juice over the seeds, then place them in the oven for 12 to 15 minutes, until the seeds begin to lightly brown around the edges. Pull the sheet out of the oven, place the seeds in a bowl, and serve.

Friday, October 26, 2012

Halloween Vase from a Salsa Jar

I have to admit that I have more than enough Halloween decorations. I believe I told Chris about a month ago that my collection was verging on “ridiculous”. But that didn’t stop me from wanting to make some more this year. The catch was that I wasn’t going to spend any money so I had to use only things that were already in my stash. So far I’ve showed you Luminaries, Painted Pots and Painted Pumpkins. Today I’m showing you a painted vase I made from an empty salsa jar.

Painted Halloween Vase

This one was really simple. I just used a sponge brush to apply silver craft pain to the outside of the jar. I painted lightly so you can almost see through the paint and it has the great textured lines. Once it was dry I mod podged on some Halloween shapes and then tied on a big black and white bow.

Painted Halloween Vase - details

It doesn’t get much easier than that!

Tuesday, October 23, 2012

Painted Pumpkins

I’ve gone paint and glitter crazy this Halloween – it seems nothing can escape my sponge brush. That includes these mini pumpkins that I decided needed a bit of dressing up.

Painted Pumpkins

If orange and white aren’t your style a little bit of paint can go a long way towards transforming your pumpkins and Halloween display. I started by making a glittery pumpkin using the leftover mixture from my Halloween Luminaries and Painted Pots. I used a sponge brush to paint on the mod podge and glitter mixture and then just let it dry.

Painted Pumpkin - Glitter

Next up I used a sponge brush to lightly add some black paint to this orange pumpkin. I wanted the orange to show through and I liked the texture the sponge brush made. I dabbed a little silver on to the top of the pumpkin for extra dimension.

Painted Pumpkin - Orange

Lastly, I painted this white pumpkin a bright blue but decided it didn’t really fit in with any of my other Halloween decor. The fix was to sponge some silver paint on, leaving just a bit of the blue peeking through. I like that it looks sort of weathered and antique.

Painted Pumpkin - Silver

All told it took me about 15 minutes to paint these little guys. I was using real pumpkins so I didn’t worry about what would work and what wouldn’t since they’re just going to be thrown out in a week or so anyway and it was fun to just be creative. I’m tempted to paint our full size pumpkin after it’s carved!

Wednesday, October 17, 2012

DIY Painted Halloween Pots

I have a ton of craft supplies and very little space to keep them all so lately I’ve been trying to use up what’s in my stash. I’ve had a stack of paper mache pots sitting in my basement since forever so decided to turn a couple of them into a fun Halloween craft. I love the way these painted and mod podged pots turned out! They were so easy and require hardly any supplies. I got my inspiration from here.
Painted Halloween Pots 

Supplies

  • Pots (paper mache or terracotta)
  • Craft Paint
  • Mod Podge
  • Cardstock
  • Glitter (optional)
  • Scissors
  • Paint Brush
  • Sponge Brush

Start by painting your pots. I made a cat and a pumpkin but use your imagination. You could make monsters or vampires or any other Halloween themed creature. While the pots are drying cut faces out of your cardstock. I found keeping the faces simple was easier and also more effective. For example, my cat just has eyes and a nose but you know exactly what it is. At this stage you can also cut out ears and/or stems depending on what kind of pots you’re creating.

Halloween Painted Pot - Cat  

Once the paint on the pots has dried use your sponge brush and some Mod Podge to attach the faces. I then gave the whole pot a coat of Mod Podge so it was shiny all over but this is optional. I sealed my pumpkin pot with glittery Mod Podge left over from my Halloween Luminaries. Click over to that post for the how to. The picture doesn’t do it justice but the whole pumpkin pot is lightly shimmery.

Halloween Painted Pot - Pumpkin 

The last step is to Mod Podge on the ears and stems. To do this just cut into the bottom of each piece and then fold the paper on one half backwards and the other forwards. This gives you two little tabs to adhere to the top of the pot. And that’s it - cute little painted Halloween pots! Including the paint drying these took me about an hour to complete. I used only materials I already had in my stash AND this is another idea I pinned ages ago and finally completed!

Pinned It – Did It Count: 4

Monday, October 15, 2012

DIY Paper Halloween Wreath

Last October I guest posted over at Clean & Scentsible sharing my DIY Paper Halloween Wreath. For those of you who missed it, I’m re-posting here today. These wreaths are so quick and simple to make – you can literally put one together in half an hour!

Paper Halloween Wreath

Here's what you'll need:

  • 12 inch Styrofoam wreath form
  • Two 12 x 12 sheets of Halloween paper (double sided if you want extra pattern variety)
  • Halloween ribbon
  • Tissue paper
  • Halloween stickers
  • Paper cutter or scissors
  • Stapler
  • Pipe cleaners

Materials

Except for the paper, I had all of this stuff in my crafting stash so hopefully you will too!

Start by cutting your paper into 1 1/2 by 6 inch strips. If you're using double sided paper you can flip half your strips over so that you end up with 4 piles of different patterns. If you're using single sided you can stick with 2 patterns or just cut only half of 4 different sheets.

Paper Strips

Next, start wrapping strips around your wreath form, one at a time, overlapping them slightly and stapling them at the back. Don't worry about how the back looks, just make sure everything is lined up nicely at the front of the wreath. Keep stapling on strips until your wreath is completely covered. Don't worry if things don't line up exactly right on the last strip as you'll be covering that spot with ribbon. Here's the front and back of my finished wreath.

Details 1Wreath Back

The next step is making the tissue paper flowers. You need 8 squares of tissue paper - the bigger the squares the larger your flower will be so consider the size of your wreath when cutting your squares. Pile the squares on top of each other and fold them like an accordion. When you've finished, twist a pipe cleaner around the centre to secure your folds.

Accordian Fold

Using scissors, cut the ends of both sides of your folded tissue into points. You can cut rounded edges for pretty flowers as well but I think the spiky kind look a bit more spooky!

Pointy Ends

Now spread your accordion out and start pulling the layers of tissue away from each other.When all the layers are separated, adjust them so that there is a flat back to your flower - that's the side with the pipe cleaner tails. Use the pipe cleaner to affix the flower to your wreath or you can hot glue it on. Repeat this process until you have as many flowers as you'd like. I only made two for my wreath because I didn't want to cover up too much of the paper. Once your flowers are in place, stick some Halloween stickers on to them.

Details 2

The last step is to tie some ribbon around the top of your wreath for hanging and you're done! Wasn't that easy? You can use this same idea to make wreaths for all kinds of holidays - just switch the theme and colours of your paper, tissue and embellishments. I made one for Valentine’s Day a couple of years back and I think I’ll do a Christmas version this year!

Thursday, October 11, 2012

DIY Glittery Halloween Luminaries

I think I might have a Halloween decorating addiction. I seriously have so many decorations for Halloween it’s ridiculous. And yet, I couldn’t resist making a few more! Tonight I’m sharing a really easy DIY luminary project. I love anything with glitter lately and this method makes sure that the glitter stays put.

Halloween Luminary

Supplies

  • Glass jar (I used a baby food jar)
  • Glitter
  • Mod Podge
  • Patterned Paper
  • Tags, Stickers etc. for decorating
  • Ribbon
  • Sponge Paint Brush

Start by pouring some Mod Podge into a disposable container (I used a clean margarine container) and then add glitter and mix well. There’s no exact measurements here – the amount of Mod Podge you’ll need depends entirely on the size of your jar – but trust me that you’ll want to go heavy on the glitter. The more glitter the less opaque your glass will end up. Once you’ve got your mixture use the sponge brush to paint it all over the inside of the jar. Make sure the entire surface is covered with Mod Podge – don’t worry, it’ll dry clear.

While your Mod Podge and glitter is drying inside the jar cut a label out of your patterned paper. I added a Halloween tag and sticker to mine. Mod Podge your label to the outside of your jar (no glitter this time).

Halloween Luminary Close Up

Once the whole thing is dry, tie on some ribbon, insert a tea light and enjoy! I wasn’t lying when I said it was easy. The Mod Podge keeps the glitter in place so you get the sparkly effect with zero mess. If your jar doesn’t turn out glittery enough the first time you can always add additional coats – just mix even more glitter into the Mod Podge.

I’ve got a couple more simple Halloween crafts coming up so make sure to check back soon!

Wednesday, October 26, 2011

Last Minute Glamour Pumpkin

Does your front porch need a little last minute Halloween flair? Nothing is easier than this pumpkin project. And with Halloween supplies on sale at craft stores this week you can make it on the super cheap too!


I started with a black craft pumpkin that I got for 50% off at Michaels. I gave it a thin coat of silver craft paint to make it streaky and let the black come through a bit. Then I hot glued some sparkly black ribbon around it, topping it with a big bow. The whole thing took about 15 minutes including the time it took the paint to dry.

The best thing about decorating craft pumpkins versus real ones is that I can use this year after year. It adds just a bit of glamour to our Halloween decor :)

Monday, October 24, 2011

DIY Grapevine Halloween Wreath

The people in our neighbourhood have really ramped up the Halloween decorating this year. I certainly couldn't have the barest front door on the block so I threw together this easy Grapevine Halloween Wreath over the weekend.


I started with a bunch of orange and black paper pinwheels that I made using this tutorial from Striving to be More. They are super easy to make if you have a scoring board. Mine is from Martha Stewart and I got it when it was on sale for 50% off at Michaels. I would definitely recommend using a coupon and getting one of your own as these pinwheels can be used for a bunch of different projects.

I finished each of my pinwheels with a sparkly foam sticker. I bought these on clearance at Winners a week ago. I knew I'd find a use for them!


Next I painted a wooden S with black craft paint. The S stands for our last name and it used to be white spring décor. I decided to paint it figuring I could always paint it back next year! I hot glued a pinwheel on for some extra Halloween flair.


The last step was to put it all together. I hot glued the pinwheels along one side of the wreath, hung the S in the middle using some striped ribbon and then tied a big bow and hot glued that on as well. I'm pretty happy with the results and even happier that it only cost me about $10 to put the whole thing together!

Friday, October 21, 2011

Free Halloween Printables Round-Up

Halloween is little more than a week away - are you all set? If you're looking for a few last minute ideas nothing says cheap and easy (but still awesome) like printable freebies from around the internet. Here are a few of my favourites.


These mini Halloween cards from Babalisme are too cute and so easy. All you need to do is print, cut and fold in half. Be sure to check out her Halloween paper dolls while you're visiting - so adorable!

The Martha Stewart website has a ton of Halloween templates and clip art like these Jack-o-Latern Party Favours. Visit Martha's Halloween page for many more great ideas.


Freak out - or just entertain - family and friends with these free printable labels from Funkytime. Your kids will love eating Brain Jam or a jar of Spill Your Guts. And I love that Sibylle even took the time to put nutritional information on all the labels as well!


Another great place for free Halloween printables is the HP Creative Studio. I'm loving these awesome pumpkin carving templates. I think I just might try the owl this year.

And this is just a small sampling of all the fun and easy printables and projects that are available all over the web. Seriously, do a Google search and get busy crafting this weekend!

Monday, October 17, 2011

DIY Halloween Frames with Free Printables

I've been loving all the DIY Halloween frames and art that I've been seeing all over blogland and decided it was time to try some spooky frames of my own.


I started with cheap wooden frames from Michaels. I think they were about $2 each. I painted one grey and the other green - they took about two coats each.


Once they were dry I took two sizes of dollar store googly eyes and glued them on. I didn't have any particular pattern in mind - I just started with the big ones and then filled in the gaps with little ones. I used regular white craft glue for this and it worked fine but I had to give the eyes a while to really set before I could handle the frames.


The last step was to use black alphabet stickers to spell out "Boo" and "Eek" and the frames were done! All I had to do now was find something to put in them.


I did a Google search for free Halloween silhouettes and came up with the witch and cat. Then I loaded them into my My Memories software and dressed them up with some Halloween paper and embellishments. It was so easy to do and I think they turned out great! If you're interested in My Memories software check out my previous post for a discount code worth $20 in savings. Or if you'd rather just use my creations then click on the images below for the full sizes. I printed them out as 4x6s.


The frames and art have made a great addition to my Halloween decor this year. If you decide to use them in yours be sure to let me know so I can take a look :)

Thursday, October 13, 2011

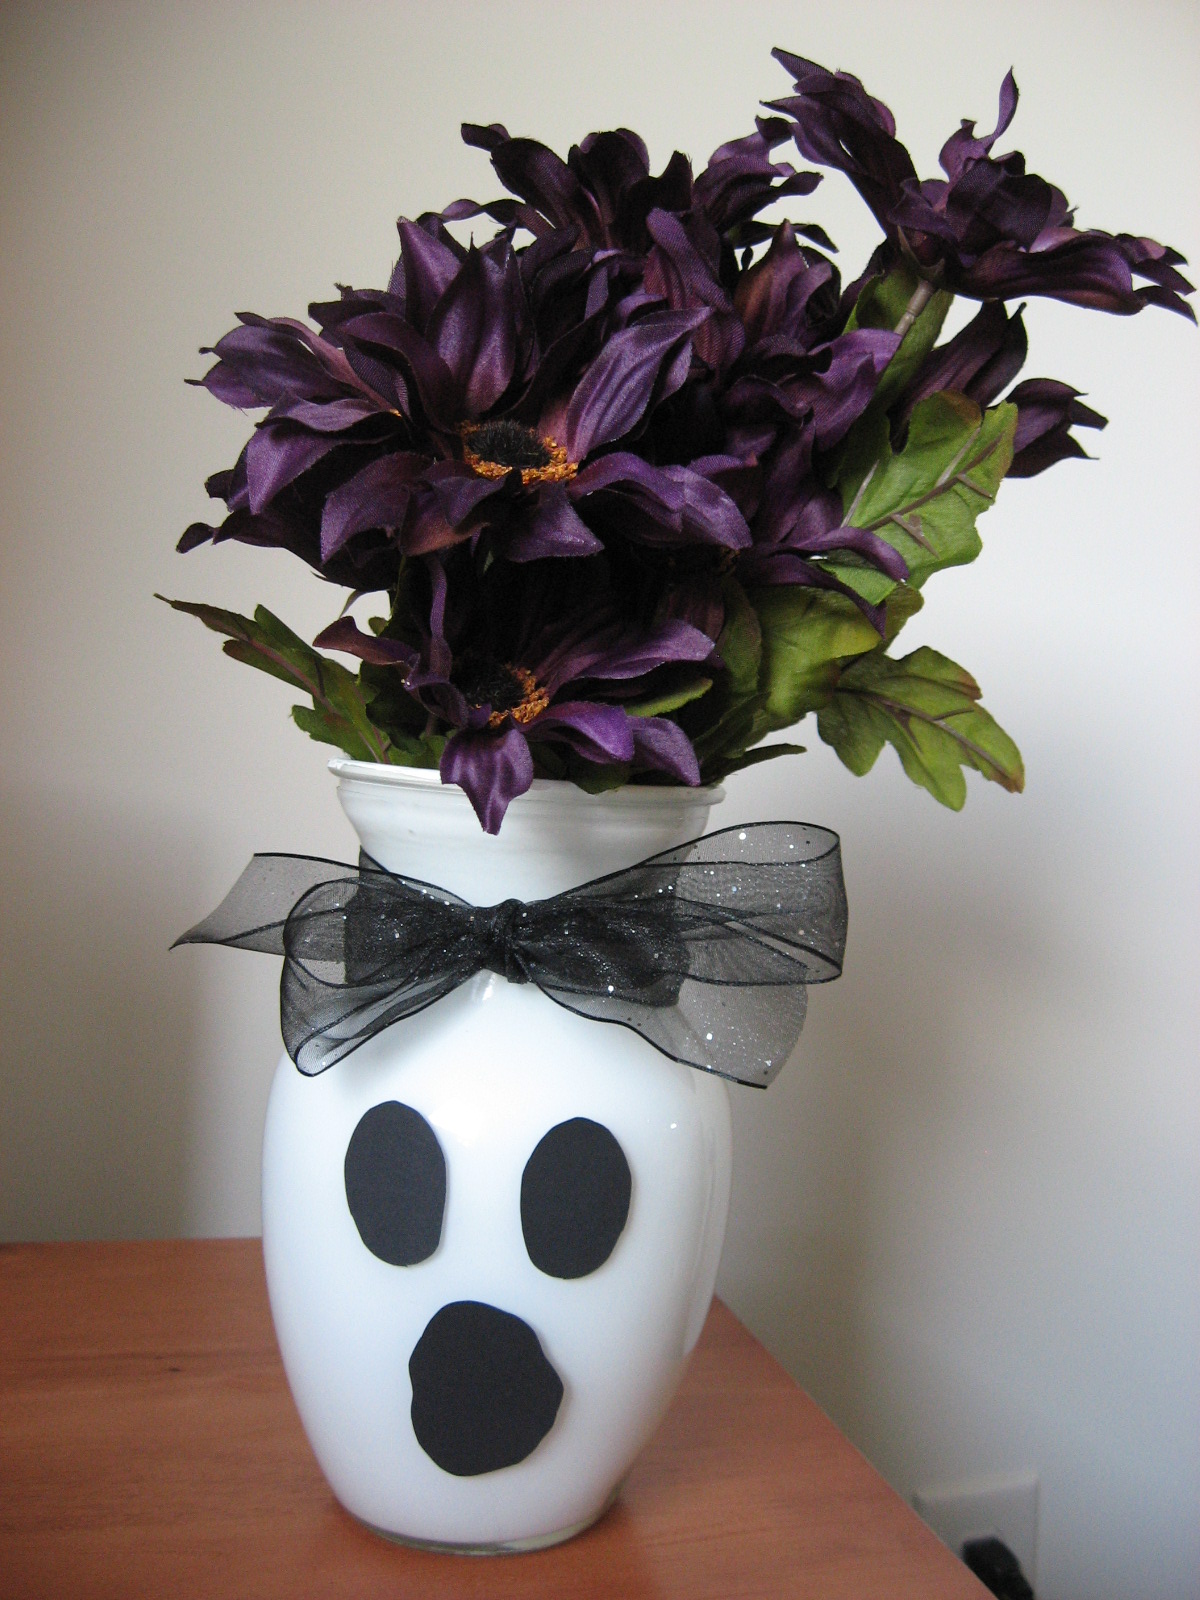
DIY Ghost Vases

Remember my Upcycled Vase that I painted with white enamel? Well white vases and bottles make great ghosts!


If you tried the enamel project or you've got some milkglass on hand then you can create a ghost in under 60 seconds. Just cut out eyes and a mouth from black cardstock and tape them to your vase. And that's it! The best part is that, because the enamel is inside the vase, once Halloween is over you can easily remove the face without any damage.


I added a sparkly black ribbon and some Halloween flowers to my ghost. The flowers look a bit like some crazy hair.


I think this turned out super cute and it's so simple that your kids could definitely do this themselves. Now my lonely ghost just needs all my other Halloween decoration to join it!

Thursday, October 6, 2011

Halloween Wreath Guest Post

Just a reminder that today I'm over at Clean & Scentisble sharing a tutorial for this fun and easy Halloween Paper Wreath as part of the Ghostly Gathering! Be sure to stop by :)