Wednesday, January 19, 2011

Party Perfect - Napkin Heart Doilies

I've seen these heart doilies in a few places but decided they fit the Party Perfect feature after seeing them used on a Valentine's Day party table on the Martha Stewart site. They are really easy and inexpensive to make and they are also really cute!


Start with a square folded napkin and position it so that the folded edge is at the bottom of the square. Then fold the bottom right corner up to meet the top left corner. It's important that you get the folded edge on the proper side so your hearts don't come apart when you cut them.


Now take the top left corner and fold it towards the triangle's longest side to form a narrower triangle.


Cut a half circle into the wider part of the triangle to form the top of the heart. Then cut the bottom corner off the triangle to make the lower half of the heart. Be sure to leave some of both sides intact so that your hearts stay together.


Unfold and admire your creation! If you end up with more than one piece then you probably made your folds incorrectly. Don't worry, I did this on my first try too! Once you've got the hang of it, try using different coloured napkins and cutting your shapes bigger and smaller to get different sized doilies. Then display with your Valentine treats, on your tea tray, or put one under each place setting at the dinner table.


Perfect to dress up any Valentine table!


P.S. Don't forget to enter my CSN Stores gift certificate giveaway!

Tuesday, January 18, 2011

Another Giveaway!

I'm excited to have been contacted again by a rep from CSN stores about doing another giveaway! Once again I'll be giving away a $20 gift certificate that one lucky reader can put towards buying anything in one of CSN's over 200 online stores. From bakeware to purses to swingsets, there are practically endless options!

I'm totally coveting this Le Creuset teakettle in Kiwi...


...this Rachael Ray ramekin set in Blue...


...and these Nordicware cookie cutters!


Now the important part...how to enter!
  1. Be a follower of Sugar and Shimmer. Not sure how? Just look for the Followers section in the right hand column, click "Follow" and then follow the prompts!
  2. Then leave a comment letting me know what you'd use the $20 gift certificate for.
  3. Be sure that I am able to contact you through your comment.
And that's it! For an extra entry, "like" Sugar and Shimmer on Facebook and leave an additional comment letting me know.

I'll be selecting a winner at random on Tuesday, January 25 so be sure to enter soon :)

I'm linking this giveaway up to the Giveaway Directory on Someday Crafts. So many great giveaways, be sure to visit!


Monday, January 17, 2011

By the Batch - Peanut Butter & Jelly Bars

I picked this week's cookies with my Dad in mind; he loves peanut butter cookies. Martha's Peanut Butter & Jelly Bars come from the Soft & Chewy chapter and are like your favourite childhood sandwich reimagined in a cookie!


Ingredients:
1 cup unsalted butter, room temperature, plus more for pan
3 cups all-purpose flour, plus more for pan
1 1/2 cups sugar
2 large eggs
2 1/2 cups smooth peanut butter
1 1/2 teaspoons salt
1 teaspoon baking powder
1 teaspoon pure vanilla extract
1 1/2 cups strawberry jam, or other flavor
2/3 cup salted peanuts, roughly chopped


Directions:
Heat oven to 350 degrees. Grease a 9-by-13-inch pan with butter, and line the bottom with parchment paper. Grease the parchment, and coat inside of pan with flour; set aside.


Place butter and sugar in the bowl of an electric mixer fitted with the paddle attachment. Beat on medium-high speed until fluffy, about 2 minutes. On medium speed, add eggs and peanut butter; beat until combined, about 2 minutes.


Whisk together salt, baking powder, and flour. Add to bowl of mixer on low speed; combine. Add vanilla.

Transfer two-thirds of mixture to prepared pan; spread evenly with offset spatula. Using offset spatula, spread jam on top of peanut-butter mixture.


Dollop remaining third of peanut-butter mixture on top of jam. Sprinkle with peanuts.

Bake until golden, about 45 minutes. Transfer to a wire rack to cool. Refrigerate for 1-2 hours and then cut into about thirty-six 1 1/2-by-2-inch pieces.


According to Sarah:
These cookies are literally like a peanut butter and jelly sandwich; they are even a little moist in the middle. They were fairly easy to make with the dough coming together nicely at the end. One thing to note is that the dough gets really thick and heavy when you're mixing in the last ingredients. I turned my back for a second to grab my pan and the bowl popped right off my stand mixer! Next time I would mix in the vanilla by hand.
They baked in my oven for exactly 45 minutes without getting too dark on top. I didn't have a 9x13 pan so I just used a smaller, deeper dish and cut my bars into smaller, taller pieces so the recipe still yielded about 36 cookies.
I will definitely make these again!


Sunday, January 16, 2011

In Stitches - Casting On Stitches

Last week I posted about the materials you'll need for our first scarf project. This week we'll learn how to cast on stitches and start knitting. And I promise you that it's incredibly easy!

The first step in starting a knitting project is getting a slip knot onto one of your needles. I wrote and rewrote the instructions for this and then realized it would be much easier just to show you this video I found on Howcast. Be forewarned that we're going to use the Long Tail method for casting on stitches so leave a long tail on your yarn, about 24 inches to be on the safe side.


Simple right? And the slip knot counts as your first stitch which means you're practically knitting already ;)

Once you've got your slip knot on your needle you are ready to start casting on stitches. There are several methods but I have found that I like the Long Tail method because it keeps your first row stretchy which means it's more forgiving for beginner knitters who are still working out problems with tension. Once again, I think it's a lot easier to watch someone do this than to read instructions so I'm sharing this video tutorial I found on YouTube.


Really easy, right? For our scarf project you're going to want to cast on 24 stitches. If you've decided to use both the lace weight and the medium weight yarn then you'll want to work with both yarns at the same time when casting on your stitches. Once you've got 24 stitches cast on you are ready to knit!

I didn't find a great video demonstrating the basic knit stitch but I did find the following text and diagrams on Craft Yarn Council and found them really easy to follow. Hopefully you will too!

Step One:
Hold the needle with the cast-on stitches in your left hand. Insert the point of the right needle into the first stitch, from right to left.


Step Two: With right index finger, bring the yarn under and over the point of the right needle.


Step Three: With right needle, pull the yarn back through the stitch.


Step Four:
Slip the loop on the left needle off, so the new stitch is entirely on the right needle.


And that's it, you're knitting! If you don't get it right on the first try just remember that practice makes perfect. Working the needles will probably feel awkward and you'll work slowly at first but the movements will start to feel more natural before long.

For our scarf all you need to do it knit every row until your knitting measures 50". If you're using both types of wool then knit with them together throughout. If you're only using the one type then your project should start to look something like this...

This project knits up pretty fast since we're using such large needles. Have fun and check back next week when we'll learn together how to bind off the scarf and add the fringe!

Friday, January 14, 2011

Not Quite In Stitches - Valentine's Day Art

I know that I promised to demonstrate casting on stitches tonight but the evening got away from me and, rather than rush the post without pictures, I've decided to postpone until the weekend. My apologies to anyone who might have been waiting on me!

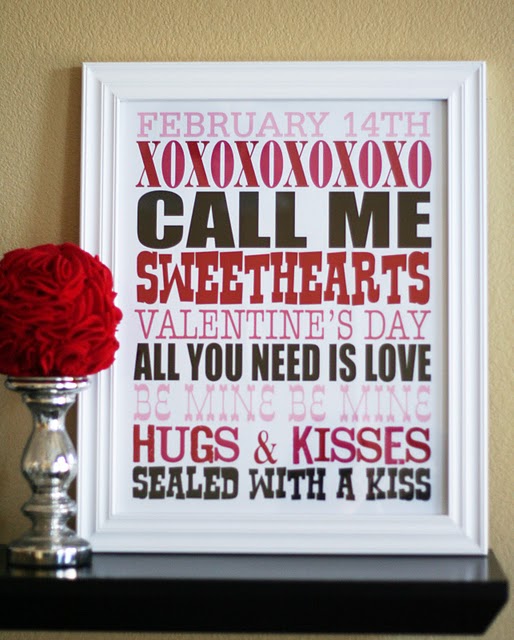
To make it up to you I've got two examples of freebie printable Valentine's Day art floating around in blogland. Simply visit the sites, download, print and frame. Easy, cheap and really cute :)

via eighteen25

via Blooming Homestead

Thursday, January 13, 2011

Freebie Valentine's Day Printables & A Winner!

Last night's Valentine entry opened the floodgates and now I'm obsessed with seeking out cool crafts and ideas for Love Day celebrations. Today I stumbled upon some really adorable printables designed by Curiosity and made available for free by HP Creative Studio.

I absolutely love the squirrel maze card and the crocodile card box! Click here to see the whole collection.


And while you're visiting the Curiosity website be sure to sign up for their Calendar of the Month Club. They'll email you a printable calendar every month in 2011 starting with this awesome Yeti for January!


Last but not least, Random.org has selected Comment #1 as the winner of my handmade card giveaway. Congratulations to Jill! I'll be in touch soon :)

Wednesday, January 12, 2011

Party Perfect: Valentine's Day Tissue Paper Pom-Poms & Flowers

I really hadn't intended to start on Valentine's Day projects this early but I stopped at my local dollar store tonight and was seduced by red, pink and heart shaped. I've got all kinds of ideas so it probably doesn't hurt to start early! Tonight's project is tissue paper pom-poms and flowers that can be used as Valentine's Day party centrepieces or wall decor.


This project is very similar to the napkin flowers I posted about last fall. Martha Stewart sells a kit for making these but you definitely don't need it since they are so easy to make. All you need is tissue paper, pipecleaners and scissors which means you can make several flowers for only a couple of dollars.

Start with 8 sheets of tissue paper placed on top of each other. Cut them in quarters for small flowers, in half for medium or leave them whole for the jumbo versions. I prefer the medium size so I usually cut them in half.


Fold the tissue paper accordion style from end to end. Secure the centre of your paper with a pipe cleaner. You could use a twist tie or string but I find that pipe cleaners are the best because they give you something to hold on to later in the process.


Next cut the ends of the tissue in either round or triangular shapes. Unfan your accordion so that you can start to pull apart the tissue layers.


The last step is to pull the layers apart one at a time. If you're making a pom-pom then  pull 4 layers in one direction and the other 4 the opposite way. If you're making a flower you'll want a flatter bottom so pull all the layers in one direction. You can hold on to the pipe cleaner while you separate the layers. When I'm finished I usually shake the whole thing by the pipe cleaner to make the layers fall more evenly and then I adjust until it looks well rounded. And that's it!


It's really easy to make the flowers into centrepieces.

You can put one flower into a pretty bowl...


...or line up a few in a basket...


....or just place a jumbo flower directly on the table.


If you'd rather hang them on the wall then you'll want to use pom-poms. Attach two by tying either end of a piece of ribbon to the pipe cleaners and then hang the ribbon on a nail or wrap it over a doorknob.


Voila! Super easy and really inexpensive Valentine's Day decor. Be sure to visit again for more V day ideas as we make our way to February 14 :)


P.S. Don't forget to enter my handmade card giveaway before tomorrow's deadline!