Just one more quick post to wrap up Father's Day. I wanted to show you the cards that I made for my Dad and my Gramps.
For my Dad's card I created a sort of collage of vintage bits and pieces that reminded me of him. I added some plaid paper and the letters to spell out "Dad" and I had the perfect card.
For my Gramps' card I cut out the words with my Silhouette first and then had to figure out what to put with them. When I found the map in my paper collection I thought it was the perfect fit for a claim of "World's Best"!
And that's Father's Day for this year. Hope all the dads out there had a great day!
Tuesday, June 21, 2011
Monday, June 20, 2011
By the Batch - Barbecue Edition
Instead of being about a batch of cookies, this week's By the Batch post is about a batch of condiments - homemade condiments that we gave to my Dad for Father's Day! He's really hard to buy for so we decided that making him something was the way to go. And at this time of year he's all about his grill so anything you can spread on meat to make it yummy was sure to be a hit ;)
The last step was to affix the cute little tag I made with my Silhouette.
My Dad seemed to really enjoy the gift and he'll be able to enjoy it all summer long. Father's Day is over but maybe this can inspire you for next year!
We made 5 different condiments (from BBQ sauce to mustard to relish) and bottled them in little jars that we bought at the Bulk Barn. I made little circle tags for each bottle and tied them on with string. Then we put all the bottles into long basket lined with rafia.
My Dad seemed to really enjoy the gift and he'll be able to enjoy it all summer long. Father's Day is over but maybe this can inspire you for next year!
Saturday, June 18, 2011
My Mom's Gardens
My parents live on 10 beautiful acres that they devote a great deal of time to maintaining. Their effort is worth it though as their property is a tree and flower filled retreat that explodes into bloom at this time of year. Visiting one evening this week I just had to take some pictures to share with you. Today I wanted to feature some of my Mom's lovely gardens and planters. She manages to create arrangements that are both natural and whimsical at the same time.
I love this arrangement the most. The little blue jay sitting in his pot on a weather beaten wooden chair. The muted colours blend so well into nature and the weathering on everything makes it seem as though it was always there in the grass.
My favourite part of my Mom's gardens is her gorgeous peonie bush. Peonies are such beautiful flowers - it's just too bad the ants love them so much because I'm afraid to bring any inside!
Hopefully you're as impressed with her work as I am. It's a gorgeous day for gardening here so I'm off to tend to my beds. Tell me, how does your garden grow?
Tuesday, June 14, 2011
Homemade Anniversary Card
I may have mentioned that, as of this past Sunday, my husband and I have been married for a year! The time has really flown by and it feels like out wedding was just yesterday. I think that's the sign of a very happy year! Of course, I would have been remiss if I didn't make Christopher a card.
I tried not to make it too mushy or girly so stuck to a simple phrase and more masculine colours. I love the metal key - that set was a great purchase from K & Company. I've used those keys already for my June magnetic calendar and the family history collage I made for Chris' birthday.
I think the best part about this card was that Chris liked it as much as I did!
Monday, June 13, 2011
By the Batch - Cheesecake Swirl Brownies
This weekend my mom gave me a packaged brownie mix that had been hanging out in her cupboard for too long. They looked good as is but I thought I could probably do even better! All it took was a quick Google search to find a whole page of "Kicked Up Brownie Mix Recipes" on Squidoo. I couldn't resist giving the Cheesecake Swirl version a try.
6 oz. cream cheese, softened
5 Tbsp. butter, softened
1/3 cup sugar
2 eggs
2 Tbsp. flour
3/4 tsp. vanilla
Directions:
Start by preparing one package of brownie mix according to the directions on the box. Spoon half the batter in a 9" x 13" pan.
Beat together all of the cream cheese swirl ingredients until smooth. Drop by teaspoonful evenly over the brownie batter. Pour over the other half of the brownie batter. Take a knife and swirl the batter and cream cheese mixture to create a swirl-like pattern.
Bake according to the brownie package directions (about 40 minutes or until toothpick comes out clean).
Ingredients:
Brownie mix & required ingredients6 oz. cream cheese, softened
5 Tbsp. butter, softened
1/3 cup sugar
2 eggs
2 Tbsp. flour
3/4 tsp. vanilla
Directions:
Start by preparing one package of brownie mix according to the directions on the box. Spoon half the batter in a 9" x 13" pan.
Beat together all of the cream cheese swirl ingredients until smooth. Drop by teaspoonful evenly over the brownie batter. Pour over the other half of the brownie batter. Take a knife and swirl the batter and cream cheese mixture to create a swirl-like pattern.
According to Sarah:
This recipe was really easy and really delicious! Brownies are great on their own but adding the cheesecake flavour made them extra yummy and the swirls make them look like they require way more skill than they actually do. Make this recipe and no one will even know that these brownies started in a box ;)Friday, June 10, 2011
Something for Nothing - Summer Printables
The sun is shining, the temperature is climbing and blogland is full of fantastic free summer printables! I've rounded up a few of my recent favourites here.
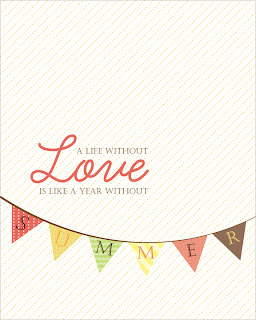
Love this print from The Arial Rose Blog. It might just end up framed in my living room!
For those of you with kids, how cute is this summer reading kit from Creative Mamma? I devoured books as a kid (still do) and would have loved keeping track of them here (still might!).
You can't have a round-up of printables these days without some subway art - it's everywhere! My favourite is this multi-coloured collection from Simple Crafter.
Last, but certainly not least, are these adorable mini notepapers from Trillustrations. Be sure to visit this site for tons of cute free printables!
I'm really in the mood for summer now - happily it's just around the corner!
Love this print from The Arial Rose Blog. It might just end up framed in my living room!
Via |
For those of you with kids, how cute is this summer reading kit from Creative Mamma? I devoured books as a kid (still do) and would have loved keeping track of them here (still might!).
Via |
Via |
Via |
Wednesday, June 8, 2011
Party Perfect - DIY Paper Hearts
Sometimes the simplest of crafts can be so pretty and have such a big impact. For our wedding I made a ton of paper hearts that we hung on all the chairs along the aisle - it made for a whimsical homemade touch that showed my personality so well. But the best part was that they were incredibly easy to make!
Start with a piece of double-sided scrapbooking paper. Alternately, you could use pages from books - you just need to keep in mind that you'll see both sides of the paper. If you're using scrapbooking paper then cut the whole 12x12 sheet into 12 one inch strips. For each heart you'll need 3 strips. Cut one in half and cut the other two down to 10 inches each.
Next line up your strips. Put the long ones in the centre with the same pattern on the outside. Then line up your little strips at the bottom of the long ones also with the same pattern on the outside - just make sure it's the opposite pattern showing on your long strips. I hope that makes sense - if not refer to the picture!
Fold each of the little pieces down to meet the bottom of the strips.
Then fold the long pieces down as well. And there's your heart! Staple everything together where all the pieces meet. If your pattern is busy then you won't really see the staple but if you don't like the look if it then you can glue one of your scraps around the base to cover it.
I told you it was easy! Switch the direction of the patterns on your next heart to have it complement the first.
To hang them just string ribbon or twine through any of the loops. You can use them as pew markers like I did, incorporate them into your centrepieces or string a row together to make a pretty garland. And they're not just for weddings - use them to decorate your house for Valentine's day, or a birthday party or just hang them up all year round!
Monday, June 6, 2011
By the Batch - Make it Bacon
Father's Day is approaching quickly. If your Dad has a sweet tooth and a bacon tooth as well then these recipes might just make the perfect gift! Now I'm a vegetarian but I have been assured by my husband that each of these treats looks incredibly appealing ;)
I was inspired to write this post by these Peanut Butter-Chocolate Chip Cookies with Bacon in the latest Food Network magazine.
Maybe your dad would love to cool off on a hot summer day with this Bacon Ice Cream courtesy of Delicious Days.
How about these Dark Chocolate Bacon Cupcakes from AllRecipes?
Last but not least, there's Bacon Fudge from The AntiCraft.
That's a whole lot of bacon-y goodness. Are you inspired to do some baking for dad this year??
Friday, June 3, 2011
DIY Planters
Here in Canada the weather is getting warmer, the days are getting longer and the flowers are in full bloom. We have a flower garden in our front yard and a vegetable garden out back but we've got nothing like these awesome DIY planters!
Love that these are made with such ordinary objects that you probably have the materials to make one of your own tomorrow. Happy weekend, everyone!
Via |
Via |
Via |
Via |
Thursday, June 2, 2011
Magnetic Calendar - June
Another new month means it's time for another edition of the magnetic calendar. Since last month was pretty and purple for Mother's Day I decided that June should be a little more manly in honour of Father's Day. This month is full of browns, greens and blues and I've replaced flowers with plaid and metal keys.
Here are a few close ups so you can see some of the elements that I used. I love the keys and the compass in place of the 28th. I found it a bit challenging to make a month that wasn't feminine just because most of my craft stash is pretty girly and I like to make these calendars without buying anything. I think I managed to do ok!
I am really loving this calendar project and I'm so glad I started it in March. 4 months down and 8 to go! If you're interested in making your own calendar then you can see my previous months here.