Friday, November 4, 2011

50 Days Until Christmas - Holiday Pinning

This week has been a busy one and I'm a little disappointed because I still had some Halloween projects to share with you but just never got the chance to post. I'm calling November 4th too late for Halloween stuff so I guess I'll just have to hang on to the photos until next year. In the meantime, did your realize there are only 50 days left until Christmas?! My husband is not into the decorating quite as much as me so we have an agreement that no Christmas décor sees the light of day until December 1. But that doesn't mean I'm not already planning my Christmas crafting on Pinterest! Here's a sample of some of the great ideas I've found.

1. Ribbon Wreath 2. Glitter Dollar Store Deer 3. Fairy Light Vases 4. Rolled Paper Card
5. Origami Wreath 6. Paper Trees 7.Winter Jars 8. Advent Calendar 9. Paper Pinecone 
Have you started your holiday to-do list yet? My next task is to get started on determining this year's Christmas cookies!

Wednesday, October 26, 2011

Last Minute Glamour Pumpkin

Does your front porch need a little last minute Halloween flair? Nothing is easier than this pumpkin project. And with Halloween supplies on sale at craft stores this week you can make it on the super cheap too!


I started with a black craft pumpkin that I got for 50% off at Michaels. I gave it a thin coat of silver craft paint to make it streaky and let the black come through a bit. Then I hot glued some sparkly black ribbon around it, topping it with a big bow. The whole thing took about 15 minutes including the time it took the paint to dry.

The best thing about decorating craft pumpkins versus real ones is that I can use this year after year. It adds just a bit of glamour to our Halloween decor :)

Monday, October 24, 2011

DIY Grapevine Halloween Wreath

The people in our neighbourhood have really ramped up the Halloween decorating this year. I certainly couldn't have the barest front door on the block so I threw together this easy Grapevine Halloween Wreath over the weekend.


I started with a bunch of orange and black paper pinwheels that I made using this tutorial from Striving to be More. They are super easy to make if you have a scoring board. Mine is from Martha Stewart and I got it when it was on sale for 50% off at Michaels. I would definitely recommend using a coupon and getting one of your own as these pinwheels can be used for a bunch of different projects.

I finished each of my pinwheels with a sparkly foam sticker. I bought these on clearance at Winners a week ago. I knew I'd find a use for them!


Next I painted a wooden S with black craft paint. The S stands for our last name and it used to be white spring décor. I decided to paint it figuring I could always paint it back next year! I hot glued a pinwheel on for some extra Halloween flair.


The last step was to put it all together. I hot glued the pinwheels along one side of the wreath, hung the S in the middle using some striped ribbon and then tied a big bow and hot glued that on as well. I'm pretty happy with the results and even happier that it only cost me about $10 to put the whole thing together!

Friday, October 21, 2011

Free Halloween Printables Round-Up

Halloween is little more than a week away - are you all set? If you're looking for a few last minute ideas nothing says cheap and easy (but still awesome) like printable freebies from around the internet. Here are a few of my favourites.


These mini Halloween cards from Babalisme are too cute and so easy. All you need to do is print, cut and fold in half. Be sure to check out her Halloween paper dolls while you're visiting - so adorable!

The Martha Stewart website has a ton of Halloween templates and clip art like these Jack-o-Latern Party Favours. Visit Martha's Halloween page for many more great ideas.


Freak out - or just entertain - family and friends with these free printable labels from Funkytime. Your kids will love eating Brain Jam or a jar of Spill Your Guts. And I love that Sibylle even took the time to put nutritional information on all the labels as well!


Another great place for free Halloween printables is the HP Creative Studio. I'm loving these awesome pumpkin carving templates. I think I just might try the owl this year.

And this is just a small sampling of all the fun and easy printables and projects that are available all over the web. Seriously, do a Google search and get busy crafting this weekend!

Monday, October 17, 2011

DIY Halloween Frames with Free Printables

I've been loving all the DIY Halloween frames and art that I've been seeing all over blogland and decided it was time to try some spooky frames of my own.


I started with cheap wooden frames from Michaels. I think they were about $2 each. I painted one grey and the other green - they took about two coats each.


Once they were dry I took two sizes of dollar store googly eyes and glued them on. I didn't have any particular pattern in mind - I just started with the big ones and then filled in the gaps with little ones. I used regular white craft glue for this and it worked fine but I had to give the eyes a while to really set before I could handle the frames.


The last step was to use black alphabet stickers to spell out "Boo" and "Eek" and the frames were done! All I had to do now was find something to put in them.


I did a Google search for free Halloween silhouettes and came up with the witch and cat. Then I loaded them into my My Memories software and dressed them up with some Halloween paper and embellishments. It was so easy to do and I think they turned out great! If you're interested in My Memories software check out my previous post for a discount code worth $20 in savings. Or if you'd rather just use my creations then click on the images below for the full sizes. I printed them out as 4x6s.


The frames and art have made a great addition to my Halloween decor this year. If you decide to use them in yours be sure to let me know so I can take a look :)

Thursday, October 13, 2011

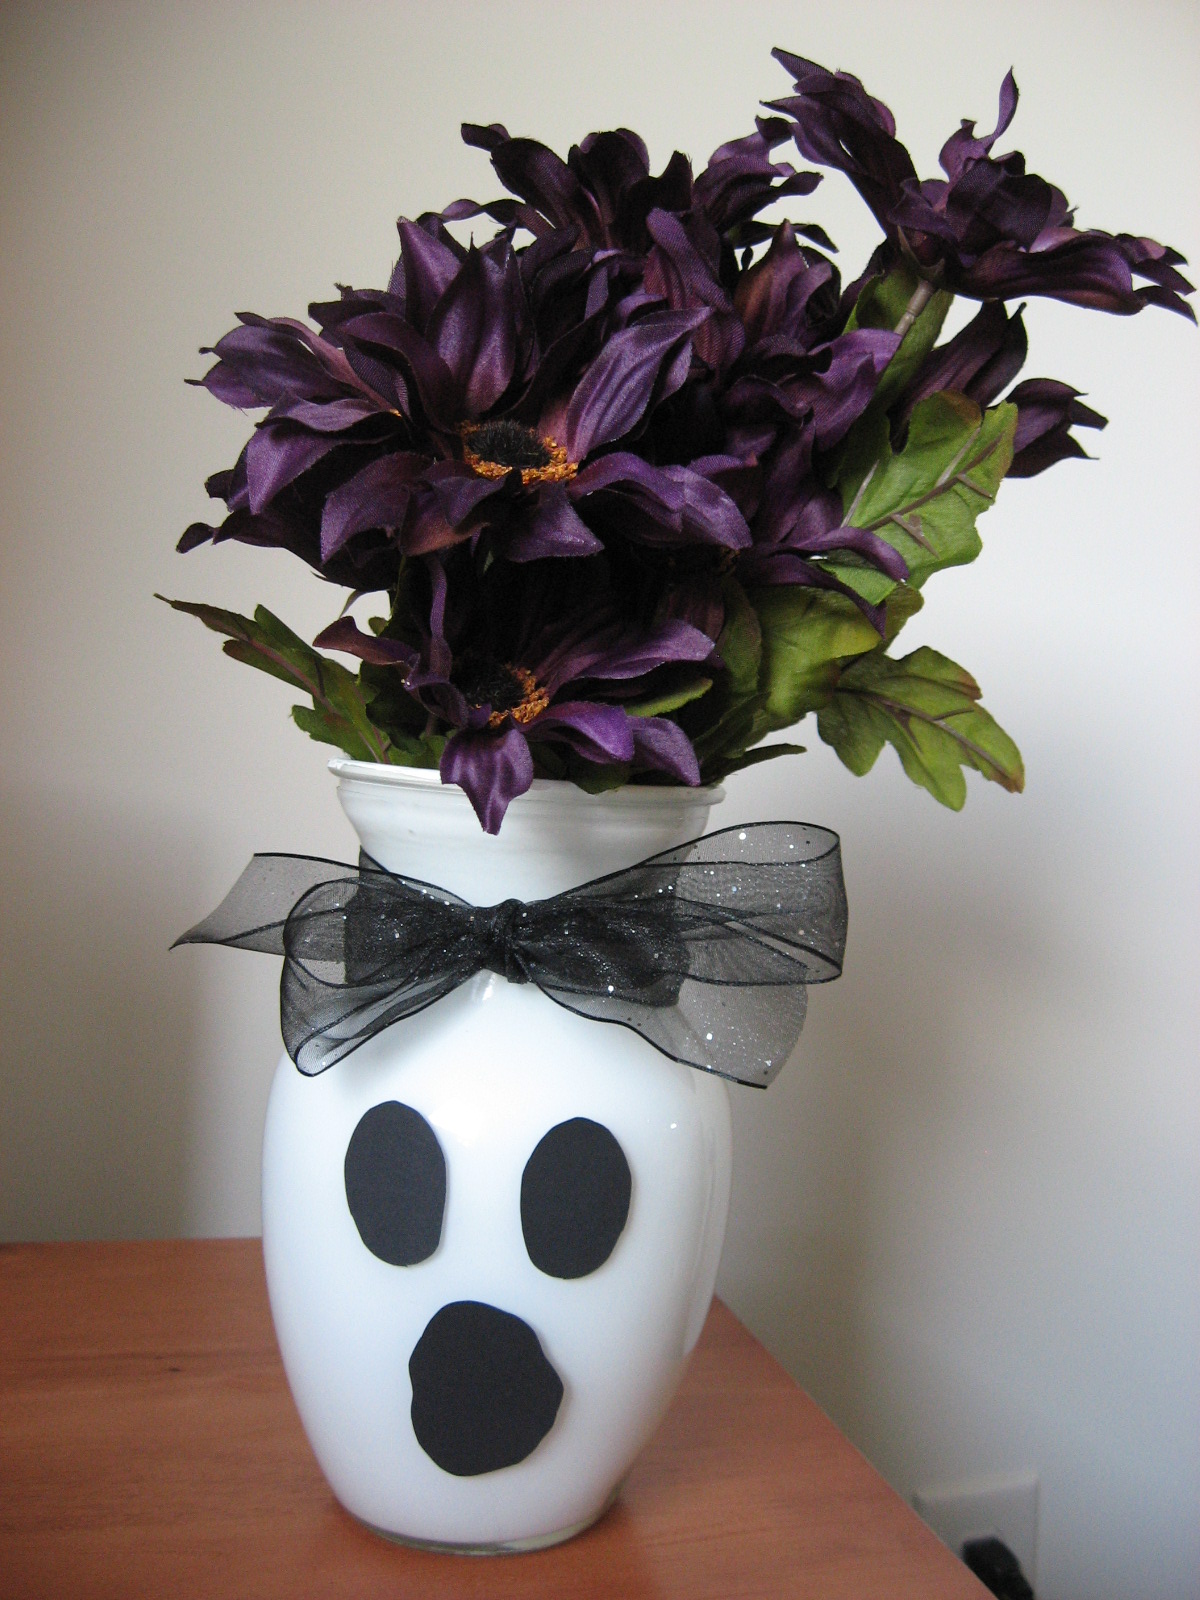
DIY Ghost Vases

Remember my Upcycled Vase that I painted with white enamel? Well white vases and bottles make great ghosts!


If you tried the enamel project or you've got some milkglass on hand then you can create a ghost in under 60 seconds. Just cut out eyes and a mouth from black cardstock and tape them to your vase. And that's it! The best part is that, because the enamel is inside the vase, once Halloween is over you can easily remove the face without any damage.


I added a sparkly black ribbon and some Halloween flowers to my ghost. The flowers look a bit like some crazy hair.


I think this turned out super cute and it's so simple that your kids could definitely do this themselves. Now my lonely ghost just needs all my other Halloween decoration to join it!

Tuesday, October 11, 2011

By the Batch - Pumpkin Dump Cake

Let me preface this post by saying that this cake is much better than its name implies. I found the recipe via the infinite wonder that is Pinterest and thought to myself, "Who would put the word dump in the name of a cake??". It turns out "dump cake" implies that you simply dump the ingredients in your pan and bake so it makes sense but there's got to be another way to make that known. Especially when the end result looks as delicious as this!


I made the poorly named Pumpkin Dump Cake using a recipe from Cookies & Cups. Here's how you can try it for yourself.

Ingredients:
1 15 oz can Pumpkin - this is about half of the bigger 867ml cans you'll find in Canada.
1 10 oz can Evaporated Milk
1 cup light brown sugar
3 eggs
3 tsp pumpkin pie spice
1 box yellow cake mix - I used Angel Food because that's what was in the house
1 cup butter melted
1 cup coarsely crushed pecans
1/2 cup toffee bits (optional)


Directions:
Preheat oven to 350. Spray a 9×13 baking pan lightly with cooking spray. In a large bowl combine the pumpkin, evaporated milk, sugar, eggs and pumpkin pie spice. Pour into your prepared pan.


Sprinkle your entire box of cake mix on top, followed by your nuts and toffee chips. Pour your melted butter evenly on top. 


Bake for 45-50 minutes until centre is set and edges are lightly browned.

We ate it warm from the oven yesterday and I am eating a cold piece with my lunch at work as I type and both are equally delicious. And this is coming from a girl who doesn't like pumpkin pie one bit. If you're looking for something interesting to make with that can of pumpkin hanging out in your cupboard then give this recipe a try. Easy and so yummy. But about that name...