Showing posts with label Cupcakes. Show all posts

Monday, April 25, 2011

By the Batch - Easter Cupcakes

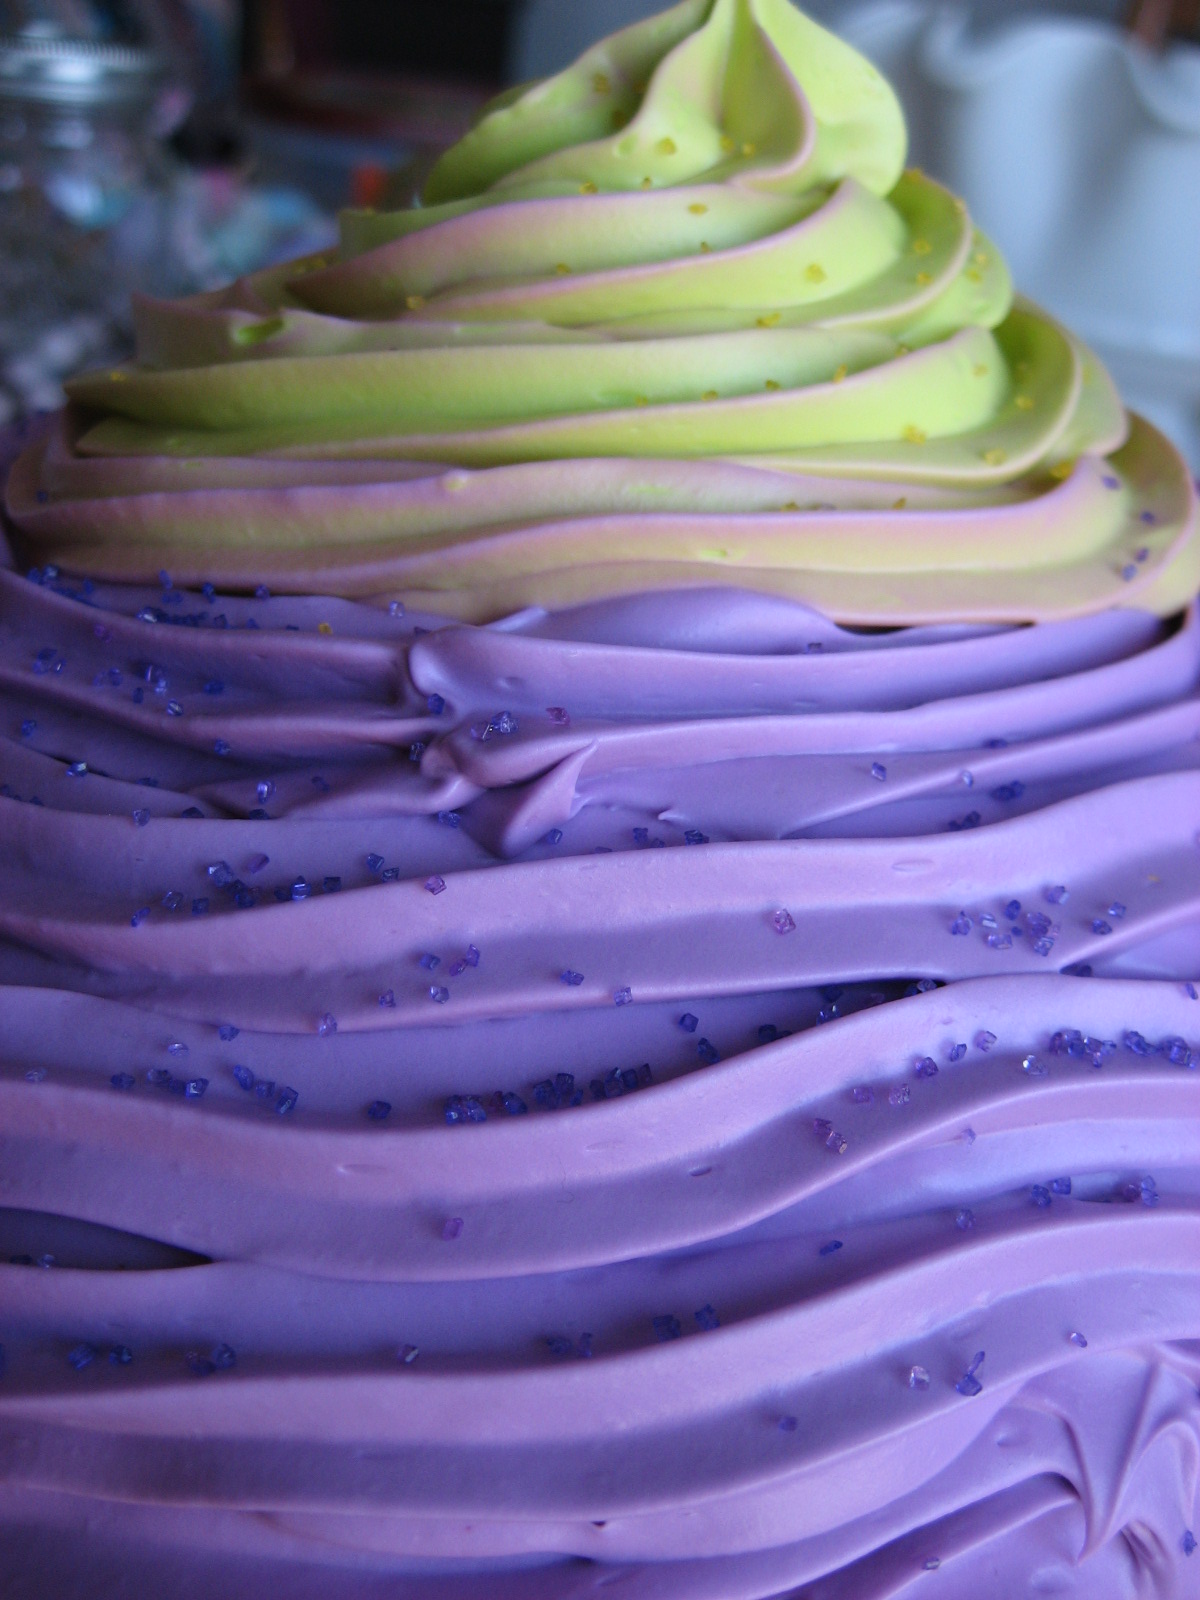
I know Easter has now passed but I wanted to show you the cake I made for dessert. I used a giant cupcake pan from Wilton to make this oversized cupcake.


The instructions say you need to use a pound cake so I used this recipe from Duncan Hines to turn boxed cake mix into pound cake. I will definitely be hanging on to this recipe because the cake turned out really moist and delicious!


I iced the cupcake with french vanilla frosting starting with purple at the bottom and working my way to yellowy-green at the top using a big star tip. My inspiration was a flower with the green as the centre.


For a little extra I added some coordinating sprinkles in purple and yellow. I wish I would have taken a picture with something in it to show scale so you could see just how big this cupcake is but to give you an idea, that first picture is the cupcake on a dinner sized pasta bowl.


With the leftover batter I made some cupcakes and iced them with the leftover green frosting, just one big star on the top of each.

Hope you had a wonderful Easter full of sweet treats :)

Wednesday, April 20, 2011

Party Perfect - Free Easter Cupcake Toppers

After a long day at the office yesterday I found myself with no energy for a Tuesday post. However, I've used some vacation time to lengthen the Easter long weekend so I'll be back again later today with a second post to make up for it! But for right now, let's get to this week's Party Perfect post.

I love cupcakes for a party. They have a lot of benefits - you eat them with your hands so you don't need to provide plates and cutlery, they are super easy to make and there are tons of ways to customize them. If, like me, you aren't able to work magic with an icing bag, then printable cupcake toppers are always a safe bet. I've rounded up some options for you to use this weekend!

The first comes from Skip to My Lou. You can grab her Bunny toppers here or her Happy Easter toppers here.


The second set of toppers is available on The Printable Party Shop by OMG. Click here to visit and see what other uses this set has.


I love these cute bunny and chick toppers from Bubbly Nature Creations. She also shows you how to make your own cupcake wrappers with scrapbook paper.


Last, but certainly not least, are these super cute Bunny Ear toppers that you can use to make your cupcakes into little rabbits. Thirty Handmade Days gives you the printable and shows you how to make feet and tails here.


These are my favourites but a Google search will definitely yield tons more. Adorable and easy Easter dessert? Check!

Monday, April 4, 2011

By the Batch - Easter Treats

This past weekend was my birthday and unfortunately, I was too busy celebrating to find any baking time. Instead I've pulled together some great ideas for homemade Easter treats that I want to try over the next few weeks!

Let's start simple with these super easy Easter Cupcakes from Kraft Canada. Use a cake mix to bake up cupcakes in any flavour then top with icing. Then make them special for Easter by building nests out of Cadbury Flake bars and Mini Eggs. So cute, easy to make and the kids can help.


I absolutely LOVE this idea for Stamped Easter Cookies from Martha Stewart. Again, it's a really simple concept - just stamp the cookie dough with regular rubber stamps before baking. This idea definitely doesn't have to be limited to Easter - you could use different stamps for any occasion!

If you're feeling a bit more ambitious then Glory over at Glorious Treats will walk you through decorating adorable cut out Easter cookies with royal icing.


Lastly, how adorable is this Easter Basket Cake made over at BabyCakes by Rachel? She made the basket with the bottom half of the Wilton giant cupcake pan which I just happened to receive from my husband for my birthday. I will definitely be giving this one a try!


How about you? Do you have any plans for Easter baking or do you have a recipe that you make every year for the occasion?

Monday, February 14, 2011

By the Batch - V Day Cupcakes

In honour of Valentine's Day I took a break from cookies this weekend and made a batch of pretty pink mini cupcakes to share with family and friends.


The cake part is French Vanilla from a plain old Betty Crocker mix. The buttercream is homemade using the recipe I learned in my Wilton class.

Ingredients:
1 cup vegetable shortening
1 tsp clear vanilla extract (make sure it's the clear kind so you end up with true white icing)
1/8 tsp butter flavour
2 tbsp water
1 lb (approx 4 cups) icing sugar
1 tbsp meringue powder
Pinch of salt

Directions:
Cream shortening, flavoring and water. Add all other ingredients and mix on medium speed until thoroughly mixed together. Blend until creamy.

This recipe yields about 3 cups of stiff consistency icing. For these cupcakes I needed medium consistency so I added water by the tbsp until the icing was thin enough. To tint the icing pink I used gel food colouring.


I used a Wilton 22 tip and piped a swirl on the top of each cupcake, working from the outside in to the centre. Then I sprinkled on some coarse red sugar to finish them off. Easy and delicious - and the mini size makes people feel less guilty about indulging :)


Happy Valentine's Day!

Monday, January 31, 2011

By the Batch - Cupcake Bites

I'm interrupting this regularly featured cookie segment to bring you something a little different this week - cupcake bites. This recipe is straight out of Bakerella's Cake Pops: Tips, Tricks, and Recipes for Irresistible Mini Treats and they're a twist on the cake pops that I made last year. If you've never visited Bakerella's site then you really must go; she's got tons of adorable ideas.


I'll be honest and confess that the reason for cupcake bites is that I made a cake on the weekend and when I tried to turn it out of the pans it fell completely apart. Well as luck would have it, a crumbled cake is exactly what cupcake bites call for so all was not lost!

 
Ingredients:
1 box cake mix (baked as directed on box)
3/4 of a can of icing (I used about a 1 cup of homemade buttercream icing)
1 package chocolate bark (or candy melts for cupcake bottom)
Coloured melting wafers (for cupcake top)
Candy Cup Mold - shaped like peanut butter cups
Sprinkles

 
Directions:
Bake your cake mix according to the directions and let it cool. After cake is cooled completely, crumble into large bowl. The texture should be fine/fluffy

 
Using the back of a large spoon, mix thoroughly with icing. It may be easier to use fingers to mix together, but be warned it will get messy.


Roll mixture into balls that are just slightly smaller in diameter than your candy mold and lay on a wax paper covered cookie sheet. One cake will yield about 48 balls depending on the size of your mold.


Chill in the freezer for 15 minutes, until they are slightly firm, not frozen.

 
Melt chocolate bark and candy melts in microwave per directions on package.

 
Using a spoon or squeeze bottle, fill a mold cavity about half full of chocolate.  Then place one of your rolled balls into it. Carefully push it down until the force causes the chocolate to push up and fill in around the sides of the ball. You may have to experiment with a couple to get the right amount. Stop pushing once the chocolate reaches the top edge because you don't want to form a lip. Repeat until all the cavities are filled.

 
Sorry for the flash in this picture - I was working fast!
Place the mold tray filled with cupcakes in the freezer for just a few minutes to let the chocolate set. Remove and then gently pull up on the cake ball top to release from candy mold.

 
Now, holding the bottom of the cupcake, dip the top in another color of melted chocolate and immediately decorate with sprinkles before chocolate sets.


According to Sarah:
These cupcake bites are adorable but they take a lot of time and patience to make. There are a lot of steps in the process and a lot of waiting for cakes to cool and chocolate to harden but the end result is worth it. Here are some tips I learned along the way that will make it easier next time:
  • Don't try to skimp on chocolate by not filling up enough of the mold. Not enough chocolate means pushing your cake balls down deeper in to the cavity. If your ball hits the bottom then your cupcake bite will not release from the mold without a fight (and damage!)
  • The molded chocolate will melt quickly while you're dipping the tops of the bites so work quickly and run your hands under cold water if you need to cool them down.
  • When dipping the tops only dip enough that the two colours of chocolate meet - if they overlap then the hot, melted chocolate will begin to melt your molded bottoms.
Cupcake bites are definitely not an every day kind of dessert but they do make really pretty treats for a party or to give as a gift. There are so many colour and sprinkle combinations and they really are delicious!


Monday, December 6, 2010

Charity Bake Sale

Today at the office we had a good old fashioned bake sale. People looked at me sort of funny when I first brought up the idea of a bake sale but I was convinced that it would be a great way to raise money for our local food bank. And I was right!


The idea was to ask my colleagues for donations of baked goods and then to sell them in the office kitchen at lunchtime. I was kind of nervous this morning about how many treats people would actually bring but I was overwhelmed by the response. We were up to our eyeballs in cookies, cupcakes and squares this morning. And everything looked delicious!

I made Butter Cookies (sort of like a cross between shortbread and sugar cookies)


and Snowman Cupcakes. I used a box of white cake mix and my homemade buttercream. Then I used regular chocolate chips for eyes, mini chocolate chips for mouths and orange jellybeans for noses. So easy but I think they turned out very cute!


People swarmed the kitchen as soon as we spread everything out and they kept on coming until almost everything was gone. And the best part? We raised $325 for the food bank!! We're going to take the money to the grocery store tomorrow and purchase food that will be given to the less fortunate in time for the holidays. The bake sale was a hit and I don't think anyone will look at me funny when I bring it up again next year ;)

This was such an easy event to put together and it was a lot of fun too. You could replicate this in your own office kitchen to raise some money for the charity of your choice. And there's no better time to give than during the holiday season.

Tuesday, October 26, 2010

Halloween Creepcakes

Halloween is nearly upon us so I wanted to share my Halloween baking project from last year, Creepcakes! I took the idea from Martha Stewart's awesome Cupcakes book.


They were really easy to make but they look impressive. Simply bake any type of cupcake you like, tint buttercream icing in fun Halloween colours and then make faces out of candy.


I went to the Bulk Barn for all of my candy since you only need a small amount of each type. I bought licorice, marshmallows, jelly beans, mini chocolate chips, silver dragees, candy corn and a bunch of other kinds. I copied some of my faces straight from Martha's book but others I invented based on the candies I had on hand. You really can't do them wrong!


For some of them, I cut the tops off, iced the base, added some candy teeth and then put the tops back on to create a mouth.


This one was my favourite. I just might have to whip up another batch this year!

Sunday, October 24, 2010

Carrot Cake Cupcakes

I was at Michaels the other night and they had $2 clearance grab bags for sale. Of course, I couldn't resist! It was actually a great value, a really big bag full of neat stuff. One of  the items in mine turned out to be a Carrot Cake Cupcake Mix from Mary Engelbreit. Totally worth the $2 on its own in my opinion! 


I had planned to make the Crustless Pumpkin Pie recipe that I posted previously but I realized this afternoon that I didn't have any Pumpkin Pie Spice. I had promised my husband a treat so these cupcakes were the perfect fix. The kit comes with the cupcake mix, frosting mix, and even sparkling sugar to put on top.


The cupcakes themselves were very easy and similar to any boxed cake mix, just add milk, oil and an egg. They came out of the oven looking a lot more like muffins than cupcakes and they had really sticky tops but a toothpick came out clean after 18 minutes, just as instructed.


The frosting mix is for cream cheese icing. All you do is cream butter then add in the mix, icing sugar and a little bit of milk. It produced more than I really needed but I guess better too much than too little. My only complaint was that, even though I followed the recipe exactly, the icing was pretty thin. I didn't even have to spread it, I just dropped a dollop on top of each cupcake and let it spread on its own. Easy but not great for presentation. Oh well, they won't be leaving the house since Chris thinks they are delicious and promises that he'll finish them quickly. The kit only makes 8 so I'm pretty sure he's telling the truth :)


Saturday, September 4, 2010

Peanut Butter Cookie Cupcakes

Generally the weekend is my chance to bake. Except for cleaning, laundry and the odd evening plan, I usually have free time to use as I please. Sadly, this weekend is the exception to that rule and I spent the better part of today working on a project for work. Nevertheless, I had promised my husband, Chris, that there would be baked goods so I gave myself an hour break this evening so I could throw together something yummy.


I find Martha Stewart endlessly inspiring; I think I could kill an entire day browsing her website. Her book Cupcakes is one I often turn to when I want to try making something new (if you've been reading you may have noticed that I really like making cupcakes!!). Since I didn't have a lot of time today I needed a recipe that was pretty easy to put together, didn't require any special ingredients that I didn't already have in the house and didn't require much baking time. I pulled out Cupcakes and found the recipe for Peanut Butter Cookie Cupcakes and it completely fit the bill. Click on the title to visit Martha's website for the recipe.


As I mentioned, the ingredients were fairly minimal for this recipe. There really wasn't anything required that the average amateur  baker wouldn't already have in her cupboards and refrigerator. The one exception might have been sour cream; it was kind of a happy coincidence that I had it. I'm pretty sure I bought if for another recipe I made a while back. As I always do, I substituted margarine where the recipe called for butter.


It was a pretty standard cupcake recipe, mix dry ingredients separate from wet and then combine. I won't bore you with the details. The one thing I will mention is that the batter stays really thick and sticky and it was a bit of a challenge getting it into the pans. The recipe calls for three scant tablespoons per liner and I started off measuring and then got frustrated and just started globbing it in. The recipe was supposed to make 30 cupcakes but, since I overfilled, I only ended up with 22. Since mine were bigger than they were supposed to be they also baked for about 17 minutes instead of the 13 called for in the recipe. But they still finished "pale golden" as the recipe said they would so I was happy!


The recipe calls for cream cheese frosting but Chris is often complaining that cupcakes are too sweet so I decided to forgo any icing at all. The cupcakes have enough flavour on their own and they are really moist. They taste like a really soft peanut butter cookie. I served them tonight with vanilla ice cream and they were a hit. I would definitely make these again. Without the icing they'd be great for a brunch!


Thursday, August 26, 2010

Hello, Cupcake!

We have guests coming to stay with us for the weekend so, instead of working on new projects, I've been cleaning my house. The fact of the matter is that my life definitely doesn't allow for daily baking and crafting (though I wish it did!) so on days where I don't get to be creative, I'm going to share things that inspire me.

Today's inspiration is the book Hello, Cupcake and its follow up What's New, Cupcake?


These two books are full of incredibly cute cupcake designs mostly made of candy and snacks. I won't claim that all of them are easy (hand painting butterflies in chocolate was not the simplest thing I've ever done) but many of them are quite quick to put together. Every design I've tried has turned out great and received a ton of compliments. The best part is that, aside from candy, you don't really need to purchase any special tools. The authors encourage you to decorate with icing in a Ziploc bag with the corner cut off!

Who would have thought that you could create cupcakes like these with nothing but icing, candy, chocolate melting wafers, plastic bags and a little patience!

Here are two of the types I have tried that I happen to have pictures of. The first is chocolate painted monarch butterflies and the second are "petit fours" I made for a baby shower. The cake in the middle was my own wacky design! Click on the pictures for bigger versions if you want to see more detail.


I absolutely recommend these; they are my go-to inspiration anytime I need a unique dessert. And once I've worked my way through all the ideas (it'll take a while!) the authors even have a blog that you can read here for more inspiration. Happy cupcaking!